Using GitHub
Objective of this article
To provide general guidance and assist you in performing common tasks in GitHub.
What is GitHub used for?
GitHub is a repository which stores the code for the data platform's infrastructure and processes (including the code for this playbook). It enables us to track and test any changes in the code before they reach the platform. Many of the processes within this playbook require you to make changes to code in GitHub in order to see them in the data platform, for example ingesting data from Google Sheets or creating Glue jobs to transform your data.
Getting access to GitHub
You'll need to create a GitHub account if you don't already have one, using your Hackney email. You'll also need to set up 2 factor authentication in your GitHub account.
Once you've done this, you'll need to ask Rashmi Shetty (Development Manager) to add you to the 'LBHackney-IT' team. This will enable you to contribute to the Data Platform projects in the team account.
There are two ways to use GitHub:
- Using the GitHub web browser interface (simply at github.com). This is the easiest to use and enables you to make simple changes through a user interface.
- Using the GitHub app. This is a more advanced tool which requires more configuration and coding.
Committing your changes to the Data Platform Project
Introduction about branches
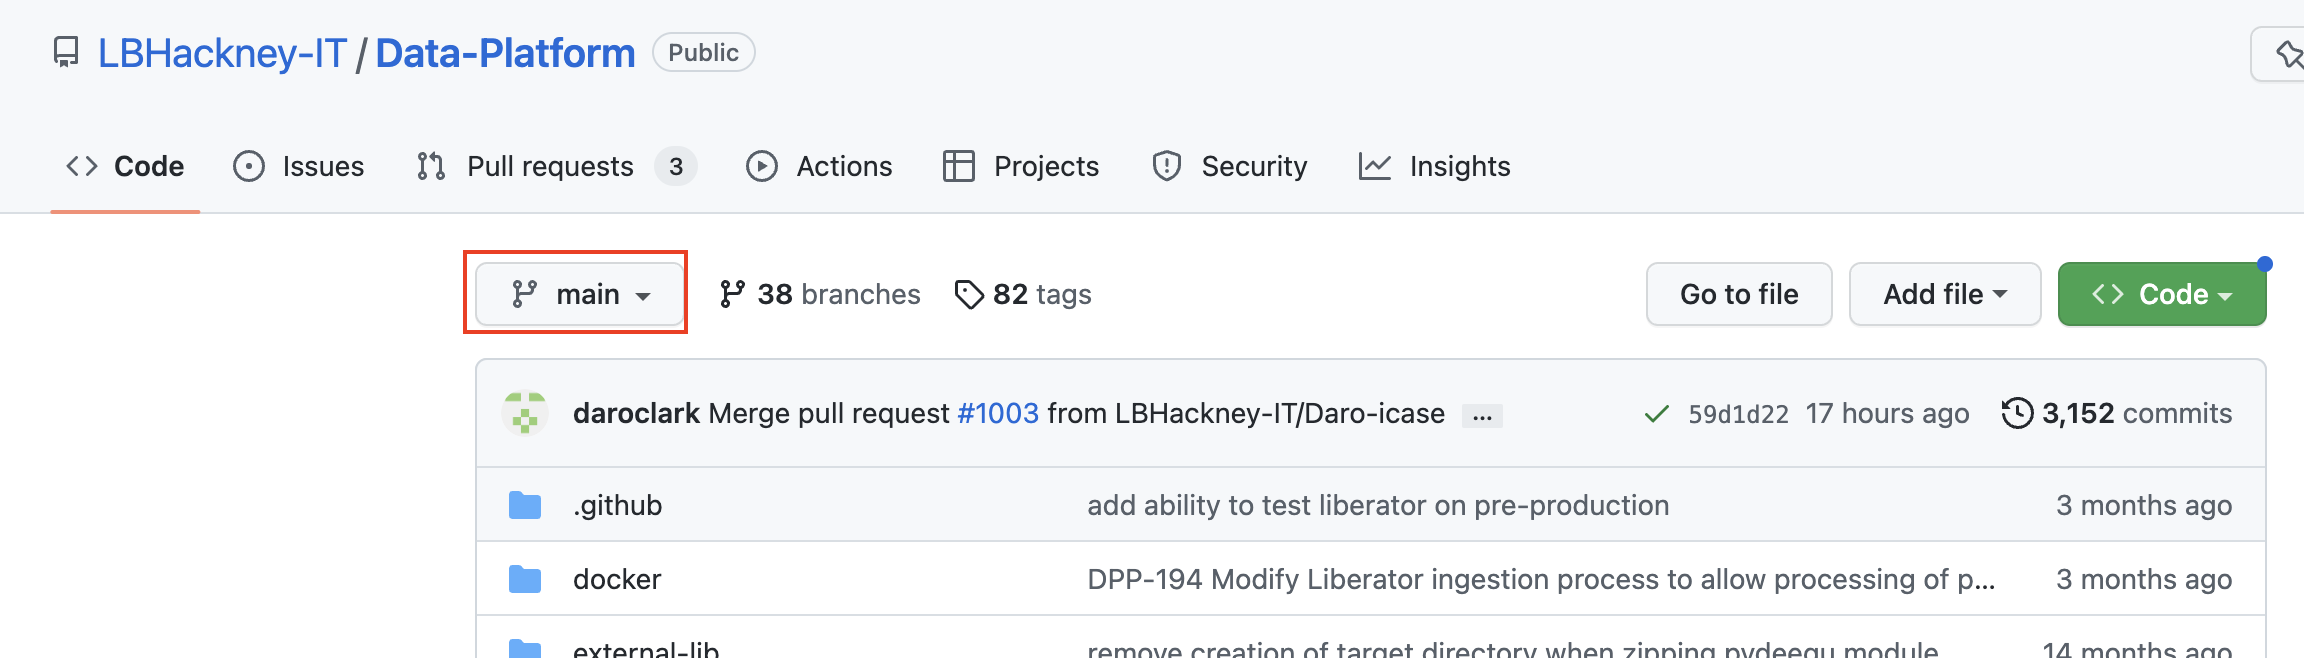
The Data Platform repository contains several branches, i.e. several versions of the code base. The current live branch is called main, this is the only branch which gets deployed into the AWS environment. You can see which branch you are looking at in the dropdown list above the code section. In the screenshot below (default configuration), we're looking at the main branch.
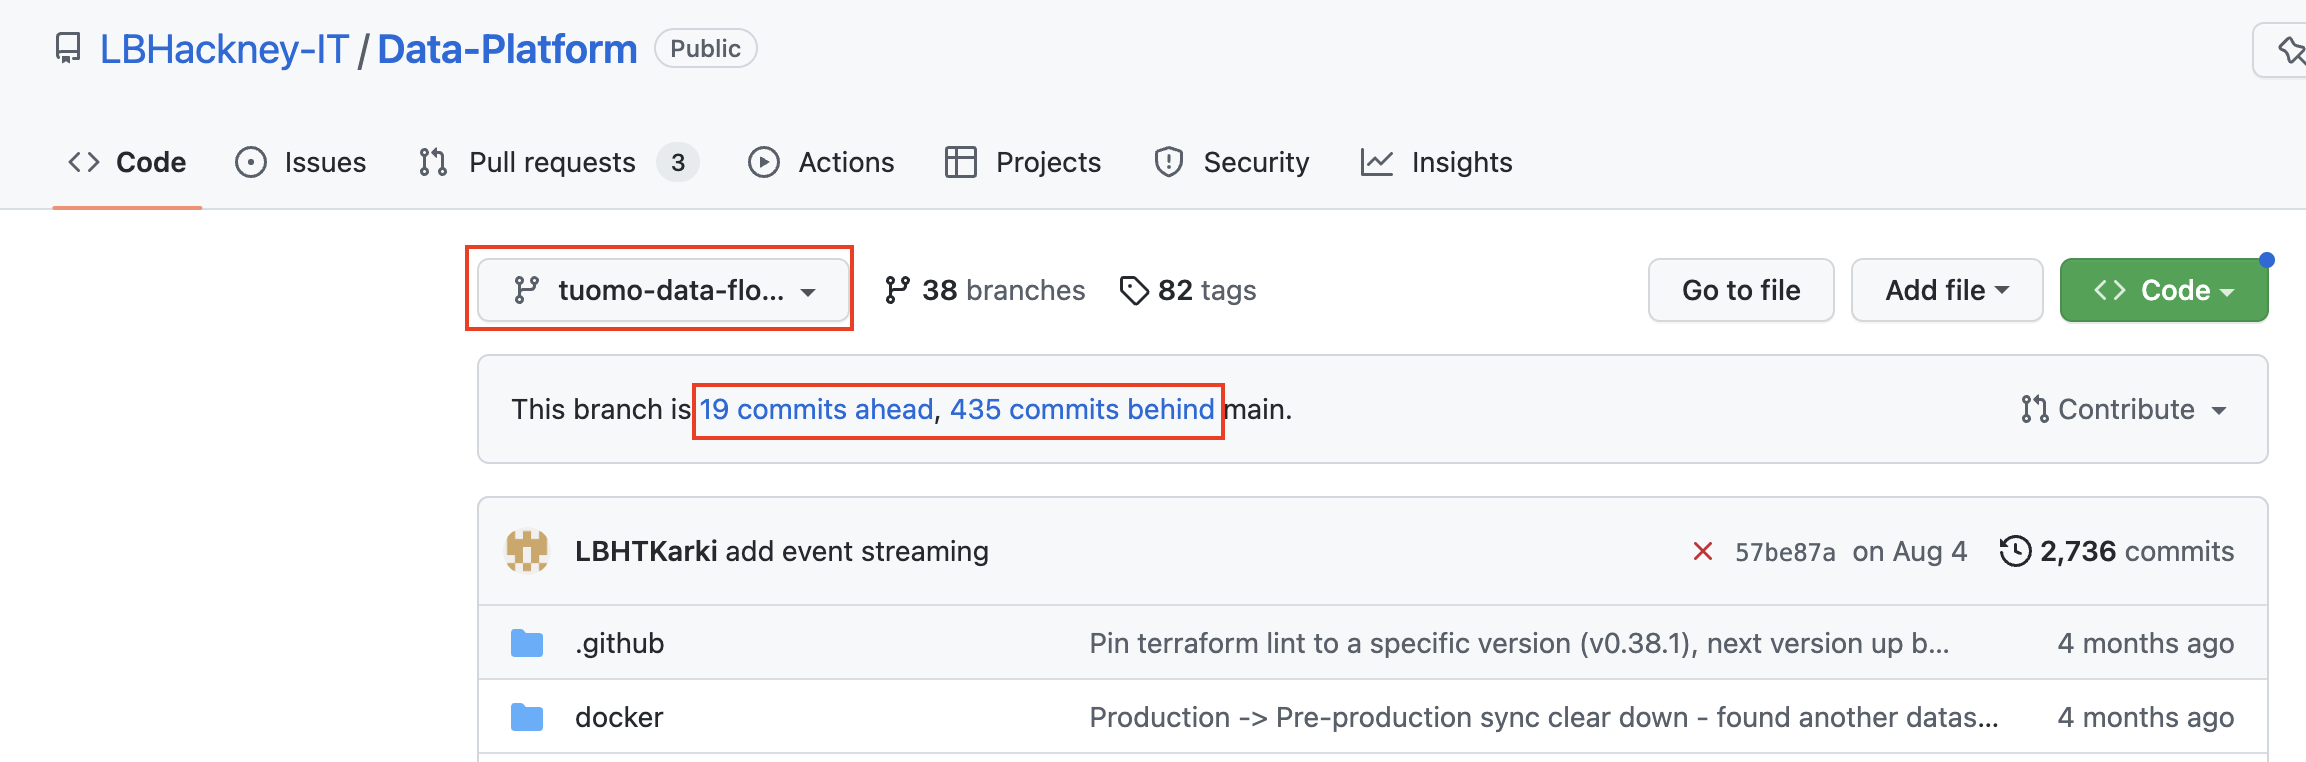
In the screenshot below, we are looking at a secondary branch that has diverged a lot: 19 changes have been committed and aren't in main yet. And since it was created, 435 changes have happened on main!
As a security measure, nobody is allowed to commit changes directly onto the main branch. Instead, changes are made on new branches that temporarily diverge from the main branch. These new branches get merged to the main branch via a process called Pull Request (PR) that involves some peer review of the code changes. This greatly reduces the risk of deploying faulty code to the Data Platform.
Two approaches are detailed below to commit your changes: creating a new branch first (useful when you want to bundle several changes), or making your changes first and creating the branch on the fly at the time you 'save' (quicker if you are only editing or creating a single file).
Creating a branch to commit multiple changes
If you are making changes to multiple files you may wish to create a branch and submit the changes at the same time. This can prevent conflicts later on when there are inter-dependencies in the files you are submitting (eg one refers to the other).
- Navigate to GitHub site and drop down the branches, type the name of your new branch and select
Create branch
- Make the changes to existing files or add new files in the new branch you have created. When you
Propose changesat the bottom of the document you will add them to branch you have created. - Once you have finished creating or editing files, navigate to the Pull Releases page and you will see
Compare and pull request. Select this and submit your Pull Request with some commentary on the changes you are proposing.
The remaining process is the same as outlined from step 6 below.
Committing one change
- Navigate to the
Commit new fileorCommit changessection at the bottom of the page. - Provide a short sentence in the first field and then an optional description in the field below to explain what you've changed.
- Select the option to create a
new branchfor this commit (i.e. the code you've changed). You can just use the suggested name for your branch. - Once you click
Commit new fileorCommit changesyou'll have the opportunity to add even more detail if needed before submitting it for review. - Click
Create Pull Requestwhen finished. - The pull request will require 1 approval. This approval can be from a member of the data platform team or another colleague familiar with the platform. At this point please reach out to the Data Platform team or colleague in order to obtain a review
- You'll receive an email to confirm when your changes have been approved or if any comments have been added to your Pull Request.
- After the pull request you created has been approved you will then have the ability to merge the pull request, Please click
Squash and mergeto complete this step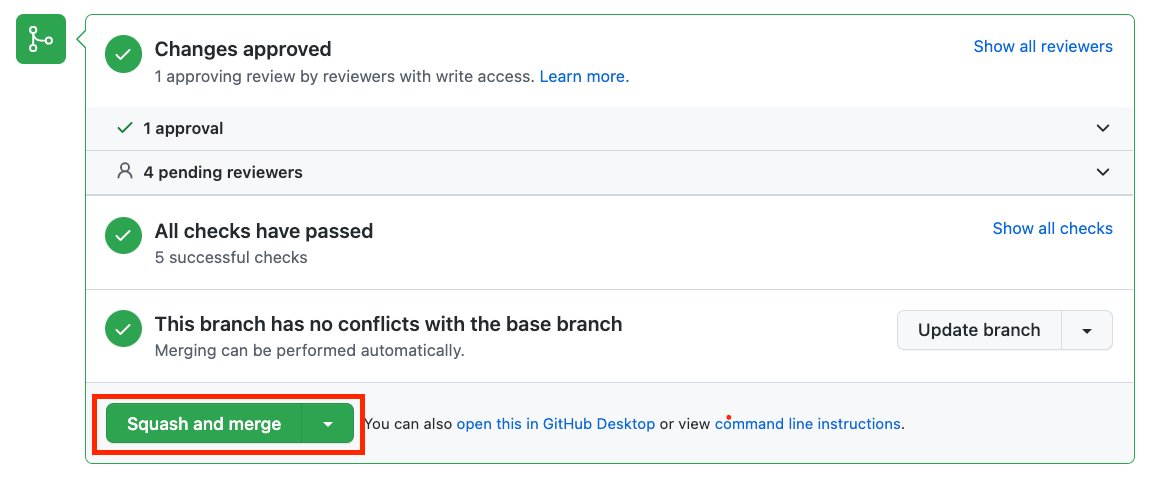
- Once you have merged the pull request you will be able to view the progress of the staging deployment by navigating to the Actions tab of the Github repository
-
- The workflow for the deployment will contain the following text under the workflow title:
Data-Platform #xxx: Commit xxxx pushed by xxxxx
- The workflow for the deployment will contain the following text under the workflow title:
- When the staging section of the deployment has finished you should be able to see that the Data Platform pre-production/staging environment has updated to reflect the changes you made in the code, and you can now perform some testing to ensure your change is working as expected
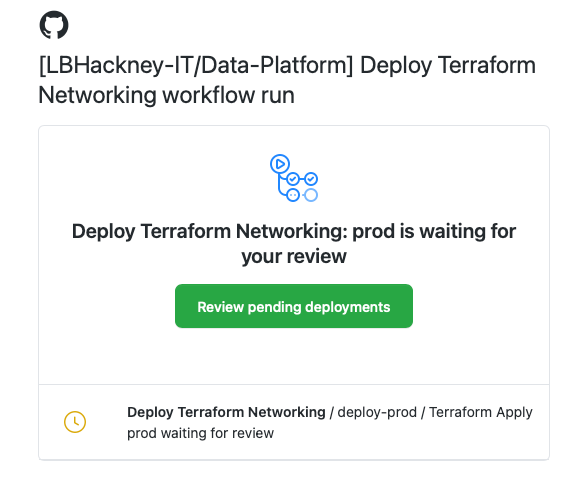
- By this point you will have received a notification email to approve the deployment of your change to production:
-
- If you are happy with how your change is performing in pre-production then please follow the links in the email you have received to progress your change to production.
-
- If the change did not work as expected in pre-production then please decline the deployment of your change to production and repeat the steps above in order to fix any issues you have found in pre-production
-
- If you did not receive an email regarding deployment of your change to production and you are ready to do so then please reach out to the Data Platform team
- If you wish to explore the deployment process in more detail please see the CD Process section of the playbook